This is an update to a 2008 post.
When you get a scanner, or a printer-copier-scanner, or some other combination of scanner whatever, you will probably get directions on how to transfer a scanner document from your scanner to your Mac.
The directions are going to vary depending on what brand you have purchased. They may well be complicated. They may well not work. I once wrote a column about having to download the print drivers for an HP printer-scanner-copier 52 times over a period of several months because it never would work properly with my Mac.
Try this when you have to scan. In most situations it will work for you. It will even work for your iPhone if you have it plugged in.
Of course, your scanner has to be turned on, connected to your computer, and your document has to be in the scanner tray.
Open Preview. Preview comes with your OS X and you can find it in your Applications folder.
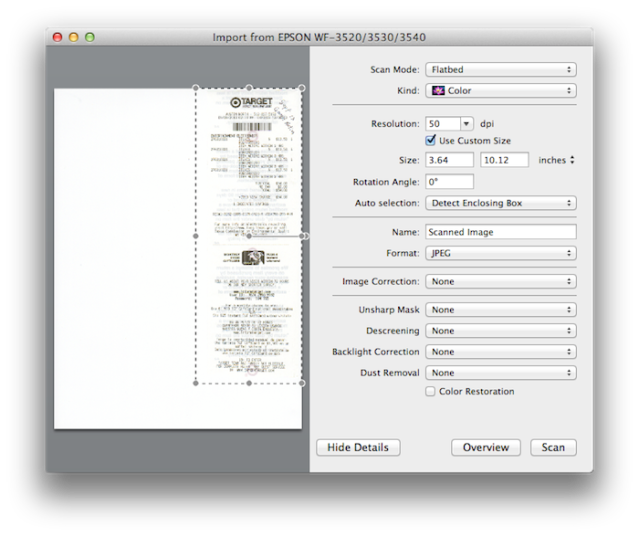
Select File > Import From (id for your scanner). Preview will reach out to your scanner and cause the scanner to scan the document and make it appear on your desktop as illustrated in this image.
At this point the scan is not complete. You get to determine the quality of the finished product. Under Kind select color black and white, or text, Set the resolution. The options range from 75 dpi to 1200 dpi. If the finished product is going on the Internet 75 dpi is fine. If you are printing a high quality photograph you will want 1200.
There are a number of other editing options such as image correction, backlight correction, dust removal, etc. As you change or adjust each one, those changes will be reflected in the Overview window. If you click on Auto selection you can instruct the scanner to only scan one portion of what is visible. This is really handy when you place 5 or six small photos on the scan base. You can save each one, one at a time.
Set the format in which you want the scanned image saved (.JPG, .PDF, etc). You name it. And then when you have all that set you place your cursor at the top left point of your image and draw across the part you want included in the finished scan.
Then click the scan button. Your scan will be saved where you want it in the format you want it, the size you want it. Every time.
I have changed scanners several times over the years, but I haven’t had a single scanner headache because of Preview. Preview does lots of other cool things as well, but this is my favorite.


Nancy, I have a Canon LIDE 20/30 scanner that is at least 5 years old. Will this technique work with an older 32-bit scanner? Thanks,
Greg
I don’t know for sure, but I have used it more than five years with no problem. Try it. You won’t harm anything even if it doesn’t work. You probably will just get an error message if they are incompatible.